Friday, March 29, 2013

The Best Vegan pizza you will ever have

 If you have read my other posts, than you know by now, I don't mess around with food. As some call me, a "food snob" I have very high standards for all types of food. My boyfriend, eats, mostly anything, he's a huge carnivore, not at all into veggies or the whole vegan thing. This pizza can be made vegan, or just dairy free, my half was vegan, his half was turkey bacon. Now, I have made him BBQ chicken pizza, meatball pizza, and sausage, he said this by far was the best pizza yet. the best dough consistency, and by far the best "cheese."
We decided to try something new called TEESE. It's vegan and NON GMO, it melts beautifully, and tastes a lot better than rice milk cheese. Wow- this stuff is pretty amazing! To use teese, for shredding, place in freezer a few minutes prior to shredding!
If your gunna have a homemade pizza night you might as well do it right, none of that L-cystine chemical laced store bought dough, I'm talkin the good stuff.
This dough recipe is originally from EMERIL. BAM!!
DOUGH RECIPE

  • 1 cup warm water, about 110 degrees F. (Do not heat your water in the microwave, lazy. boiling water does not dirty a pot/kettle. use the stove. The only thing that should be microwaved is a sponge.)
  • 1 packet dry [active] yeast
  • 1 tablespoon organic sugar
  • 2 tablespoon organic olive oil
  • 2 1/4 cups flour (may use more or less, for a double batch I used 4 1/4 cup flour)
  • dash of salt
  • dash or garlic powder
  • dash of oregano/basil
  1. Your best bet is to have a kitchenaid mixer. If you don't have one, go buy one, because they are freakin awesome. So you will be using your dough hook, for mixing this. Into the bowl goes your yeast, sugar, and warm water. NOT HOT WATER, HOT WATER KILLS YEAST. NOT COLD, COLD WON'T ACTIVATE THE YEAST. WARM. Give it a gentle stir, and let sit for a minute or so.
  2. add the other ingredients and mix until mixed through, and well, dough like.
  3. Take it out, and either in your hands or on a floured surface shape into a ball.
  4. put your dough ball in an olive oil greased bowl, and cover with a clean dish towel.
  5. place in a warm draft free place for 1 hour to rise, it should at least double in size.
After your dough has risen, preheat your oven to 500 degrees F. Figure out what you want to top your pizza with; artichoke hearts, spinach, kale, mushrooms, garlic, asparagus, cooked pasta, tomatoes, basil, zucchini, fried eggplant organic beef meatballs, vegan meatballs, sausage, bacon..... Whatever you decide. I used mushrooms, spinach and garlic.
  1. clean and dry your veggies. then slice em up.
  2. heat up some olive oil in a pan on medium low heat.
  3. add garlic, stir, cook 1-2 minutes
  4. add mushrooms, cook until soft and browned.
  5. add spinach and cook until wilted.
  6. Feel free to add a touch (I said touch, not teaspoon or pinch) of salt or dried herbs.
  7. While your veggies are cooking up, you should be shredding your teese.
  8. Take out your dough, and with your hands begin to stretch it apart. on a floured surface or your greased baking surface lay your flattened stretched dough. ( I laid it on a greased cookie sheet, according to alton brown your supposed to preheat your pan in the oven, and put the pizza onto a hot pan, either way works.)
  9. spread/flatten your dough to desired thickness. I like pizzeria style, as thin as it goes, if it rips, pat some extra to the hole and mush it back into one piece. If your dough is uneven it will cook unevenly, and you will get raw and burnt spots, try to make it flat, use a rolling pin if necessary  To make the crust use two hands, one hand using your fingers to pull some dough away from pizza, and other hand patting the thick extra dough thinner into the pizza. Or whatever is easiest for you.
  10. Spread your homemade or organic tomato sauce on your dough. (you can also use BBQ sauce, or whatever) I don't like light sauce. For the perfect amount, you want to completely cover the pizza, no holes, no transparent sauce spots, a nice even layer.
  11. evenly lay down your toppings.
  12. sprinkle on top you shredded teese. For a tasty crust, brush with olive oil.
  13. place on bottom rack of oven for 7-12 minutes or until desired done-ness.
  14. let rest for 1-2 minutes before eating.
  15. Enjoy the best vegan pizza, ever.


Monday, March 25, 2013

Awesome healthier chocolate chip granola bars


Ingredients:
  • 1/4 cup coconut oil
  • 1/4 cup honey
  • 1/3 cup (a littlle less than) organic brown sugar
  • 2 cups organic toasted oats
  • 3 tablespoons ground flax meal (optional)
  • 1 cup all natural crisp rice cereal
  • 1 dash of vanilla extract (optional)
  • 2 tablespoons to a handful of natural chocolate chips or dried cranberries

In a small pot on the stove heat coconut oil, honey and sugar. Bring to a low bubbling boil, lower the heat and cook for 2 minutes longer, stirring.
In a medium bowl combine oats flax, and cereal. Pour over the sugar mixture, and stir until well combined.
Let cool for a few minutes, and then fold in chocolate chips.
Spoon mixture into a parchment paper lined pan (about 9x9)
press down, make sure it is one even layer.
top with more wax paper, and place a heavy object(s) on top.
in 3 hours cut your bars and enjoy! To store wrap in bpa free plastic wrap, or wax paper.
do not refrigerate, they will harden


Almond flax blueberry "souffle'" muffins no sugar added and gluten free option

Now, this isn't your typical muffin, so don't expect it to come out like one. The crust of this muffin gets crispy if you cook it long enough but the inside is a soft creamy like texture, almost like a thick bread pudding like consistency. I'm assuming this is because of the banana.. I thought they came out good, they just aren't regular muffins! I hate blogs that say their recipe is sooo amazing and perfect, and you make it and your like wow, thanks for lying to me. I don't mess around when it comes to food, these are pretty delicious, but if your looking for a light crumbly dunkin donuts cake like muffin, this isn't it!
***The next day these muffins are much less creamy inside and more muffin-like. I store in an airtight container, at room temp.

Ingredients:

  • 1 cup unbleached flour, whole wheat flour                                                                                        [or for GLUTEN-FREE use organic rice flour or all purpose gluten free flour]
  • 3/4 cup almond meal
  • 1/4 cup ground flax meal
  • 3 tablespoons chia seeds (optional)
  • 1 tablespoon non aluminum baking powder
  • a dash of sea salt
  • 1 super ripe banana (if you only have a yellow banana, stick the whole thing in a warm oven for a few minutes)
  • 3 free range organic eggs
  • 1/4 cup sunflower or grape seed oil
  • 1 cup organic unsweetened rice milk, or almond milk
  • 4 tablespoons honey (optional) I felt like the batter ws too bland, I like tastey things so I add honey!
  • 1 teaspoon vanilla extract
  • 1 cup berries (i used frozen wild blueberries, I would recommend thawing)
  • non Gmo cooking spray (optional) --I use sunflower oil in my misto sprayer, it's awesome
  • sliced almonds for topping (optional)

If you don't have a ripe brown banana stick a banana in a warm oven.
In a medium bowl whisk together flour,  almond meal, flax meal, baking powder, chia seeds and salt. In this batch I didn't use chia, but It will help you feel fuller!


*Preheat oven to 400 degrees F. Place muffin liners in an 18 ct muffin pan. And (optional) spray the muffin liners with non stick spray. I only say this because my muffins really stuck to the paper cups!
In a large bowl smash and pulverize your banana the best you can. If you over warmed your banana, and it is a hot mess, do not add your eggs yet! You will get banana-scrambled eggs!

Add eggs, milk, oil, honey, vanilla.. you know.. whisk/blend together well
Slowly add dry ingredients until well mixed, then fold in your berries

fill muffin cups about half way with mix, and bake for about 20 minutes, more or less. A toothpick should come out clean.
You can take them out like this, or you can wait until the tops begin to lightly brown.


crispy on the outside, slightly creamy in the inside, but not gooey or under-cooked tasting.
enjoy!


The original recipe can be found here


Monday, March 4, 2013

How to make an awesome quick dairy free and wheat free pizza

Gluten free dairy free vegetable pizza
First see what you have, no sense buying more ingredients if you have some on hand. Then decide how quick and easy you want your pizza to be.

Options for the crust:
  1. making a dough from scratch (obviously this takes the most time and work)
  2. Using brown rice wraps (gluten free) or whole wheat wraps for the crust
  3. Using a pre-made ciabatta pizza crust from trader joe's (easiest method, and I think it;s vegan too)
Now, we are in a mostly dairy-free household, and I kindly encourage everyone to live the same,
So for the pizzas I made, I used vegan rice milk cheese, you could also use daiya mozzarella shreds, or whatever works best for you.
If you are making dough from scratch do it in the morning so it's ready to go when you need it.
Here is a simple dough recipe from food network (-I like to add garlic powder, olive oil, and dried herbs)
when your ready to make your pizza preheat your oven to 400 degrees F.
Shred your cheese (if it's not shredded already.)
If you put your "cheese" in the freezer for a few minutes prior to shredding, it shreds nicer.
Now the vegan rice milk cheese, you want to shred it extremely fine, because sometimes it doesn't want to melt easily.
See what's in your fridge for toppings.... Possibilities are endless.. Check your freezer too.
My boyfriend's BBQ chicken pizza:
  1. take a pre made ciabatta pizza crust, and spread an even layer of your favorite natural BBQ sauce.
  2. Then lay pieces of cooked leftover chicken on top. Lightly drizzle or brush with more BBQ sauce.
  3. Then top with shredded vegan cheese. 
  4. Your best bet with these cheese is to put the pizza on the middle rack, on broil, for about 2-3 minutes, checking every minute. Once the cheese looks melted, then cook the pizza at 400 degrees for about 15 minutes or so. For a crispier crust place directly on rack.


Gluten free Vegan vegetable pizza:
You can also do this with regular wraps, it's really really quick, and easy, and great when you have leftover wraps in your fridge.

  1. take 2 wraps. sprinkle vegan cheese entirely on one, put other on top, like a sandwich. Cook that at 400F, flipping once for about 5-10 minutes, depending on your oven, your wraps, and how you like your pizza.
  2. While it's cooking take out some frozen artichokes hearts  (or whatever you want) and brown them in some olive oil. Add some fresh kale, sea salt and garlic powder. Let cook for about 2 min longer, or until kale starts to wilt.
  3. Check the wraps.. After the inside cheese melted and the wraps cooked a bit, take it out and smother it in a good homemade tomato sauce. 
  4. Then place your cooked veggies on top, and sprinkle with vegan cheese.
  5. Your best bet with these cheese is to put the pizza on the middle rack, on broil, for about 2-3 minutes, checking every minute. Once the cheese looks melted, then cook the pizza at 400 degrees for about 10 minutes or so. For a crispier crust place directly on rack.

Tuesday, February 26, 2013

Decadent Vegan Cinnamon rolls

Why vegan? I looked up a recipe for cinnamon buns, it has tons and tons of butter, sugar and whole milk. Gross. I mean delicious, but gross. If you could d have something that tastes Delicious  but is a 100 times better for you, wouldn't you want that instead??

Read directions carefully before starting. These are somewhat time consuming, they take just about all day to prepare, so do it on your day off. Here, is a video on how to make them, which may be helpful to roll them properly

Dough ingredients:

  • 2 cups rice milk
  • 1/2 cup sunflower seed oil ( or grapeseed, or organic vegetable oil. Corn and canola oil are certainly GMO)
  • 1/2 cup organic sugar (or you can use stevia, maple sugar or coconut sugar but I'm not sure on the ratio)
  • 1 package dry active yeast
  • 4 1/2 cups unbleached flour (or all purpose gluten free flour will work fine I'm sure)
  • 1/2 heaping teaspoon aluminum free baking powder
  • 1/2 scant/small teaspoon baking soda
  • dash of salt
  • dash of vanilla extract
Filling ingredients:
  • 1 cup coconut oil
  • 2 tablespoons of cinnamon
  • 1/2 cup organic agave syrup (or a different organic sweetener)
  • maple syrup to taste (about 3 tablespoons)
  • dash of vanilla extract
Icing ingredients:
  • 1 cup organic agave syrup
  • 1/4 cup almond milk
  • 3 tablespoons coconut oil
  • dash of salt
  • 4 tablespoons maple syrup
For the dough, heat the milk, sugar, and oil in a pot for about 5 minutes, or just under a boil. Set aside, and wait to cool to Luke warm or 95 degrees F. After it has cooled sprinkle the yeast on top, and let sit for 1 minute.

In a large mixing bowl combine 3 1/2 cups flour, with the milk mixture. Stir/mix gently until well incorporated. 
Then cover with a clean dish cloth, and set in a somewhat warm place for 1 hour.

After 1 hour, the dough should have almost double in size. Remove the cloth and add remaining 1 cup of flour, the baking powder, the baking soda, vanilla and salt. Mix until everything is combined.
Cover the bowl with plastic wrap and place in the fridge for 1 hour.
While the dough chills prepare your surface, a clean countertop or cutting board is best, wax paper moves around too much. Flour your surface and prepare your filling.
You can heat all ingredients together, or only melt the coconut oil and sprinkle/drizzle the other ingredients as you go. I though it was easier to just make 1 simple sauce.
I combined all filling ingredients in a small pot, and melted it on the stove. Taste it and make sure it's good!
** Edit-- If you let the coconut oil start to cool back to room temp, it will thicken, and ooze less while you roll your cinnamon log.

Take out your dough, and take about half of it, stretch and flatten it, and try to roll it out into a thin rectangle. Have paper towels close by, this gets extremely messy. 
completely cover your flattened dough with the filling mixture, spreading around with your fingers.
then gently tap the horizontal ends up a little bit, almost like making a pizza crust, to try and keep some filling from spilling out. Then take one end and tightly roll it into itself. The filling will ooze everywhere so be prepared.Once it is completely rolled, place it seam side down.

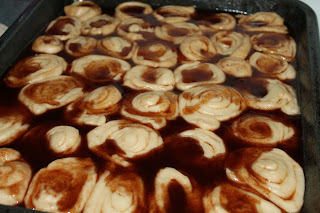
This is what your cinnamon log should look like once it's rolled. Grease 1-2 deep dish pans, and preheat the oven to 375 degrees F.
slip a cutting board underneath your log, and slice about 1 inch thick "rolls" off the end of it.
Do the same technique with the remaining dough, and then stick your cinnamon rolls in your greased pans. Make sure to line your oven shelves with tinfoil in case the filling bubbles over.
Dump remaining filling on top, cover with a clean dish cloth and let sit for 20 minutes.
after 20 minutes pop it in the oven and prepare your glaze.
For the glaze, heat the coconut oil in a small pot, and other other ingredients, stir and remove from heat.
Cook the cinnamon rolls for about 20-25 minutes or until golden brown. Do not let them get too brown unless you like them crunchy. If you don't pack your rolls as tight as I did it should be 15-20 minutes.
As soon as your sure they're done, take them out of the oven, and immediately pour glaze over-top.
Let cool for 1 hour at least. Serve and enjoy.


Wednesday, February 20, 2013

Why you should have aloe vera in your home

Aloe vera, nature's medicine, what makes fresh aloe so much different then the bottled stuff at the store? 

First off, usually anything fresh and raw is better than processed. Bottled aloe vera is heavily processed, and chemicals and preservatives are added.

Benefits of Juicing your aloe vera

  • helps asthma
  • boosts immune system
  • digestive aid
  • mild laxative, lubricates digestive tract
  • lowers blood sugar
  • lowers cholesterol
  • fights cancer
  • boosts oxygenation of your blood
  • protects the body from oxidative stress
  • prevents kidney stones and protects the body from oxalates
  • alkalizes the body (brings it to correct ph)
  • treatment for ulcers, IBS, and crohn's disease
  • provides minerals, vitamins, enzymes and glyconutrients
  • prevents and treats candida infections (candida infection is usually caused by antibiotics)
  • protects kidneys
  • provides electrolytes
  • speeds healing

But, it's great on your skin too!! If you see acne developing, clean your face using diluted tea tree oil (diluted with water), and witch hazel. Let dry and apply fresh aloe vera.

Repeat 1-3 times a day.
Aloe is also claimed to slow down the effects of aging on the skin. And if you thought aloe vera gel felt nice on your sun burn just wait until you try the real deal! You'll never want to use the bottled stuff again! Aloe works great on all burns, and is great to keep in the kitchen.
Aloe contains bradykinase, salicylic acid (main component of asprin) and magnesium lactate, which help reduce inflammation. Applying aloe directly to a cut or burn will not only soothe it, it will protect it from infection, and speed the healing process.


I am not a doctor, and these statements have not been approved by the FDA. Only drink aloe juice in moderation because it can have a laxative effect. Aloe cannot treat 3rd degree or serious burns. If you get an infection while using aloe, consult a physician.

Tuesday, January 15, 2013

No bake vegan chocolate avocado pudding


First off, I would like to say this recipe is definitely not for everyone. Black bean brownies- yes, most people will love it.
 This, is definitely different than your average pudding. I thought it was nice, good flavor, and creamy pudding consistency. My son absolutely loved it. But, I think you can taste the avocado, so if you really hate avocado, you might not like this pudding. 
My boyfriend who hates avocados and mashed potatoes... hasn't tried it yet. I'll post his review tonight. ***So my boyfriend says "not as lumpy as the other one, I guess it's okay.."

So I found this recipe on the cooking channel
The original recipe makes a lot more, I cut it in half, and added peanut butter.
You will need:
  • hemp or chia seeds
  • coconut oil
  • 2 ripe avocados
  • filtered water
  • sea salt
  • vanilla
  • agave syrup or raw honey
  • cocoa powder or raw cacao
  • creamy peanut butter (optional)
  • raw walnuts (optional)
  • FRESH LIME JUICE


Step 1: combine 3/4 cup water, and 1.5 tablespoons of chia seeds in a blender or food processor. Blend

Step 2:Add a little under 1/2 cup agave syrup, and about 1 tablespoon of coconut oil. Cut avocados in half, remove pits, and spoon out flesh into blender. Discard peels in compost (or use them as bowls!) Cut a lime in half and give it a couple squeezes. Lime or lemon juice is important to protect the avocado from browning.

Step 3: Add 1/2 cup cocoa powder, a few dashes of sea salt, a dash of vanilla extract, and a heaping tablespoon of peanut butter or almond butter. Blend until creamy and all lumps are well blended.

It comes out like a thick, creamy, luscious, chocolate pudding.
spoon into a cup, bowl, or your avocado peels. Add chopped raw walnuts/pecans or raspberries...